Beginner’s guide to macro photography — capture flowers, insects and more
Macro photography is the art of making the smallest subjects appear larger than life. By working at life-size reproduction (a 1:1 ratio), it reveals details that are too small to be seen by the eye — the structure of an insect’s wing, the crystal edges of frost or the intricate texture of a leaf or flower. Unlike astrophotography, which reaches into the depths of space, or wildlife photography, which often depends on long lenses and distance, macro thrives on closeness and intimacy.
Macro requires a different way of thinking about focus, depth of field and lighting, but you don’t need to venture far to get a great shot. With the right lens and a bit of patience, even a windowsill or backyard can provide a whole range of subjects ready for their close-up.
Getting started with gear

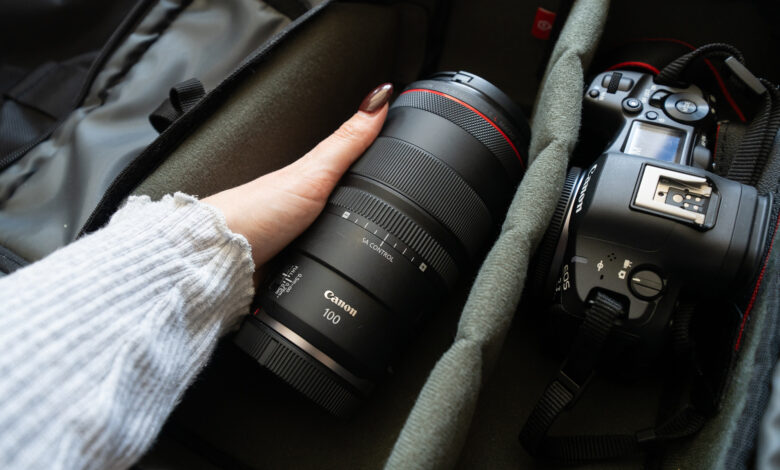
You don’t need loads of kit to start macro photography, but knowing your options is a good place to start. You’ll need an interchangeable-lens camera and a macro lens, ideally, although there are alternatives if you can’t afford a macro lens straight away.
A dedicated macro lens is the obvious choice if you can invest in one. True macro lenses can capture subjects at life-size (referred to as 1:1 ratio), with some macro lenses capable of 2:1 or even 5:1. Shorter lenses, around 50mm, work well for indoor setups or small inanimate objects, while longer lenses, around 100mm or more, let you keep more distance from living subjects like insects, so you won’t scare them off by getting too close.
But if a dedicated macro lens is a little out of reach at first, there are other options. You can use macro filters that screw onto the front of your lens to magnify your image, or use extension tubes to reduce the minimum focusing distance of your existing lens. Alternatively, the most affordable option would be to reverse-mount your existing lens using a cheap reversing ring. When the lens is reversed, it magnifies what it sees, which is beneficial for macro photography.
Macro techniques
Image 1 of 2


Shooting at a higher magnification throws the photography rules you already know up to 11. The first thing you’ll notice when shooting macro is how tricky focusing becomes. The camera’s autofocus really struggles when you’re working just a few centimeters away from your subject, so most macro photographers switch to manual focus.
Using live view on your rear LCD screen and utilizing focus peaking (if your camera has it) makes fine-tuning your focus a lot easier. When you’re focusing on a tiny subject that could fly away at any second, try gently moving the camera back and forth to fine-tune the focus without having to re-adjust your grip on the camera.
Image 1 of 2


Depth of field is another big adjustment. At close distances, even narrow apertures only give you a sliver of the image that’s in focus. For example, f/16 on a macro lens could produce a similar look to f/2.8 on a standard lens — yet another reason why nailing the focus is vital. Similar to wildlife photography, getting the subject’s eye sharp and in focus is the most important thing, even if the rest of their body is out of focus. Then, as your skills and experience progress, you can experiment with focus stacking to get the entire subject sharp.
Lighting also matters more than you might think. The narrow apertures required for macro don’t let in much light, but shooting in bright light isn’t always the answer. Bright light will produce harsh shadows, some of which may be caused by you if you’re shooting between the sun and your subject. In addition, when leaning over live subjects, casting a shadow across them can scare them off as they fear predation. To get even lighting on your subject, or if you’re shooting indoors, a flash with a diffuser (even a white piece of paper to bounce the light) will produce soft, even lighting across your image.
Finding your subject

The great thing about macro photography is that you don’t need to book a trip to Africa for an expensive safari or spend hours in the cold waiting for the sky to cooperate. Insects, flowers and interesting textures are everywhere once you start looking for them — your backyard or local park can keep you busy for hours.
When you’re photographing insects and other small creatures, timing makes a big difference. Many insects are ectothermic, meaning they rely on external heat sources to regulate their body temperature. As a result, they tend to be less active, and therefore easier to photograph, early in the morning when they haven’t yet warmed up from the sun. Although morning is generally better as the temperature has cooled overnight, you can still photograph butterflies and other invertebrates in the early evening once the sun starts to set.
Image 1 of 2


Plants and flowers are great for practicing, and they won’t run away. If you have a flash, make an indoor setup with some cut flowers to refine your technique without worrying about the weather or wind, as any tiny breezes will be magnified outside.
Some photographers still resort to unethical methods of photographing insects, like chilling or freezing them to slow them down or kill them altogether, just for a shot. While it might make subjects easier to photograph, not only does it harm them, but it also undermines the spirit of observing and photographing nature. Ethical macro photography relies on patience and respect for your subject.
Source link